The Connection, Inc Blog
Facebook remains one of the most visited places on the Internet. Meta (the parent company to Facebook) also features WhatsApp and Instagram on their roster and has faced numerous security and privacy failings over the years. In this week’s blog, we’ll take a brief look at some of the most noteworthy.
Chances are your business has a social media presence in at least some capacity, as it’s a good way to drive traffic to your business. However, hackers want to leverage this benefit against you. A new malware specifically targets Facebook business accounts to launch malicious advertisement campaigns using your own money against you.
The metaverse is a buzzword that many companies have been throwing around in recent years, but what is it, exactly? You might want to sit down for this one, as it is going to get a little complicated and, perhaps, even a bit confusing. We’ll do our best to unpack what the metaverse is, why there is such an emphasis on it these days, and what you might expect to see from a metaverse in the future.
Hackers have often used email to trick users into clicking on fraudulent links or to hand over important credentials through phishing scams, but these are usually blocked by an enterprise-level spam blocker. However, hackers have learned that there is indeed a way around these spam blockers, and it’s through popular social media websites.
The advantage of Facebook is also its disadvantage: the fact that you’ve likely got a large variety of people on your friends list. While this works out great for networking, it may mean holding back on posting a personal opinion if it isolates or offends someone you’re friends with. To get around this social dilemma, Facebook allows you to hide your status from one or more friends. Here’s how to do it.
To get started, create a post like you normally would by opening a new status update. Type whatever it is you want to post and then click on the privacy control button, located on the bottom right side of your status window. This will cause a drop down menu to appear.
By default, your privacy setting will be set to Friends (unless you’ve previously changed it). Scroll down and select Custom. This will open a new popup window for Custom Privacy.
From here, go to the section titled Don’t share with and select the form. Next, enter the name of the person you wish to exclude from seeing your post. If there is more than one person that you wish not to see your post, then go ahead and enter their name(s) too. Additionally, if you happened to have your friends already organized into lists, like family, coworkers, etc., then you can enter the entire lists into the form and exclude everyone on the list from seeing your post.
Upon completing this form, select Save Changes. You’ll next be taken back to the Update Status window. You can now say whatever it is you want to say and select Post without having to worry about someone taking it the wrong way!
Now technically, the only way the person you excluded would be able to see your post is if you went back and changed the privacy settings to include them, or if you edited the post by tagging their name. However, after going through all of this trouble to exclude them, you probably don’t want to do that--unless you’ve had a change of heart.
Depending on your social sensitivities, this little trick may make using Facebook a completely different experience for you. Or, from a business perspective, it can be a way for you to share your true thoughts about a product or service, without having your friends associated with said product or service find out what you posted.
Of course, all of this is for nothing if your social media post gets relayed in real life to the person you intended to exclude, which is why you’ll want to be mindful of your mutual friends, and perhaps exclude them too.
Are you one to hold back what you really think on social media because you don’t want to offend any of your friends? If so, is this tip a game-changer for how you use Facebook? Share your thoughts in the comments.
Have you ever encountered something that you thought was interesting on social media, and you wanted to share it with your friends? Before, sharing a link or a story would also slap a status update on your Facebook profile, for all of the world to see. Now, however, Facebook offers an alternative, in the form of sharing a post on the News Feed without also posting it to your timeline.
When Facebook released its Messenger app in 2011, it was primarily designed as a way for users to chat with each other outside of the main Facebook app. Since then, Facebook has added a plethora of new features and upgrades to Messenger, making it a tool that may have what it takes to meet the needs of your business.
The Internet is always changing, and anyone who has been using it for a while has experienced this change for themselves. While it might be strange to think about, the latest statistics have proven that the current changes to the Internet are some of the most significant--especially for businesses. “Online business as usual” will be significantly different moving forward.
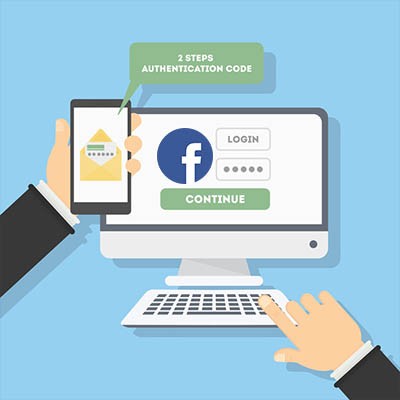
If you use Facebook, you likely have a lot of personal information stored there. If you use it for your business, then your professional reputation also partially relies on what you put into the social network. If you aren’t protecting your Facebook account, you could be at risk for identity theft or worse. That’s why using two-factor authentication on your social media accounts is becoming more important than ever.
If you use Facebook, you’re not alone. There are over two billion active users on the platform. Whether you are willing to accept it or not, Facebook is a huge part of a good chunk of the world’s lives. If being a well-connected, with the times, user has always described who you are, then we could have some helpful information oriented towards you in our blog today. We will be discussing your online identity, and who you have told Facebook you are.
In part one of this series we started to go through Facebook privacy failings, but we didn’t really give you any information you can use. For part two, we have decided to take you through some security setting for Facebook.
Facebook has over two billion users, and as a result, it has its fair share of privacy snafus. While they do (finally) make available all of a person’s Facebook information, their strategies to success are important reasons why there are so many privacy concerns throughout the online world.
Making it a priority to know how to take control over your personal information on Facebook is a good place to start. Let’s run through Facebook’s privacy settings, and get you set up with two-factor authentication.
Let’s start from a PC. Head over to facebook.com and log in.
Making Sense of Facebook’s Security and Privacy Options
Once you’re logged in to facebook.com, you’ll want to click the little down arrow on the top right of the page. In that menu click on Settings. This can get a little confusing, so if you ever need to start from the beginning know that using the little down arrow can bring you back.

Make Sure the General Account Settings are Right
You will want to verify that you own and control all of the email accounts tied to your Facebook account. If you used an old email address (that you can’t get into), you’ll have a hard time getting back into the account if something were to happen.
Security and Login - Find Out Where You’ve Logged into Facebook
Click Security and Login on the right.
On this screen, you can see all the devices your Facebook account is currently signed into. You will be confused why there are so many, but think about it: how long have you been using Facebook? For many people it’s not out of line to suggest that they are on their fourth or fifth phone since first using the Facebook app. This means that these devices will show up. You don’t use a Nokia Lumia 920 any longer? Not many people do. Facebook gives you the option to sign out of any of these devices by accessing the three-dot icon next to the device’s name.
It’s a good practice to keep your account logged out on devices you don’t typically use to access Facebook. If you see any suspicious devices among your list of approved devices, you will immediately need to change your password (directions below).

Change Your Password
Changing your password regularly is a good idea, but you definitely don’t want to use the same password over multiple accounts. To do so here, you will want to click on the down arrow on the top right of Facebook, going to Settings, and clicking Security and Login.
How to Enable Two-Factor Authentication
If you haven't heard of two-factor authentication, it is the practice of setting your account up with an additional layer of security. To get started, select Use two-factor authentication and click edit. Click Get Started.

A screen will pop up that gives you two Security Methods. Before choosing an option, you should understand both.
Option 1 - Authentication App - Clicking on this option will allow you to use a third-party app to authenticate your identity. Popular authentication apps include Google Authenticator, Last Pass Authenticator, or Duo Mobile. Using the authentication app option is more secure than option 2, but it does require you to have access to the mobile device that the authenticator app is installed on.
To set this up, open your authentication app on your mobile device. It makes the most sense to use the authenticator app that you use for other accounts, but if you don’t have one, and you have a Google account, use Google Authenticator.
Then, from Facebook on your computer (see the above screenshot), select Authentication App and click Next.
Facebook will present you with a QR code to scan. In your Authenticator App, add a new account (typically there is a + icon to tap) and scan the QR code. Once scanned, the app will generate a six-digit number to use. Facebook will ask for a Confirmation Code. Type in the six-digit number and you’ll be set.
Option 2 - Text Message - Option number two sends a code via text message to your mobile device. Make sure that you enter the correct number. This method may not be as secure as using an authentication app, but for practical purposes it will do.
Select the Text Message option and click Next, Facebook will text you a code. Type that code into Facebook and voila, you are in.
Depending on the option you choose, Facebook will walk you through the next steps to verify and enable two-factor.
Add a Backup Plan
Once you’ve set up your method, Facebook will provide you with an option to Add a Backup. If you chose to set up two-factor with an Authentication App then Facebook will allow you to set Text Message 2FA as a backup, and vice versa. It’s not a bad idea to set up the other method as well, just in case.
Nowadays, a lot of online accounts offer 2FA, but Facebook also lets you have Recovery Codes (Google also does this, so if you have a Google account or use Gmail, it’s a good idea to get all of this set up over there as well).
Back on the Two-Factor Settings page, under the Add a Backup, there is an option for Recovery Codes.
Click Setup, and Facebook will pop up a window telling you about recovery codes and click Get Codes.
At this time, Facebook will provide you with 10 recovery codes. You can use them in an emergency to get back into your account. These codes are just single-use 2FA codes, so you’ll need to know your password and one of these codes to get back into your account. Since these codes can only be used once, you can request 10 new codes at any time by returning to the Two-Factor Settings page. Keep these codes in a safe place to ensure your account isn’t accessed by anyone else.
Setting Up Extra Security
If you go back to the Security and Login area of the settings menu, scroll down to Setting Up Extra Security.
This area allows you to set alerts when a new device or browser is used to log into your Facebook. The menu allows you to define additional email addresses. You can also have those notifications sent to you via Facebook Messenger, SMS, or as a Facebook notification.

Below that option, you can choose 3 to 5 Friends to Contact if you get locked out of your Facebook account. If you choose this option, you will want to make sure that you only list people that you trust. If they are like-minded about their own privacy, the better off you will be.
This is admittedly a lot to take in, but setting up two-factor authentication and having control over who can access your Facebook account will go a long way toward securing your Facebook experience. You’ll still be inundated with stupid memes, but at least your personal data will remain secure.
Check back for part three of our Facebook privacy series and leave any thoughts you may have in the comments section below.
Social media - we can’t live with it, but we really can’t seem to live without it. People who frequently read our blog will notice how often we discuss Facebook, one of the biggest players in the social media space. Seeing as privacy is one of the biggest concerns today, we’re wrapping up our short series on Facebook by reviewing the settings you might not have realized were options on your Facebook profile.
 Social media addiction is a problem that plagues most modern businesses. Even though it’s a best practice to leverage social media to your business’s advantage, it’s a well-known fact that social media addiction can lead to wasted time and distractions in the office. In order to beat social media addiction in the office, it’s best to understand how it comes about, and what you can do to help your workers leave it alone, rather than locking everything down completely.
 Facebook is a powerful networking tool that can help you build relationships with new professionals and introduce your product or service to entirely new markets and groups of people. That is if you know how to use it. Here are five steps you can take to get started with Facebook and use it to build a professional network.
 Facebook has come a long way. Originally designed as a networking tool to be exclusively used by college students, Facebook now has 1.44 billion active users, making it the world’s largest social network. Today, businesses take Facebook seriously and utilize it for their marketing initiatives. However, it’s still viewed as a time-waster by many office managers who restrict or ban employees from accessing it.

